I painted my bathroom floor: Here's the how-to & my review six months later
- Hannah Harrelson
- Sep 19, 2023
- 2 min read

I'm back with another home project on a budget. The basic beige ceramic tile in our bathroom wasn't jiving with the makeover I dreamed up, but designer tile was out of the question - so I settled for some primer, paint and patience.


Here's what I did:
Clean - Cleaned the floors extremely well. Get your scrappers out and get any caked on dirt or grim off the floor. Vacuum, scrub, and mop. Make them sparkle.
Prime - On a completely dried surface, put down a coat of bonding primer. You can do more than one coat if you're a nervous nelly. I used Behr's bonding primer available at Home Depot. The can says "For challenging surfaces requiring advance adhesion," and then indicates tile being one of those surfaces, along with glass, metal, etc. I was super happy with this stuff. Be sure to read the direction in depth on the back for application tips. It's not complicated at all.
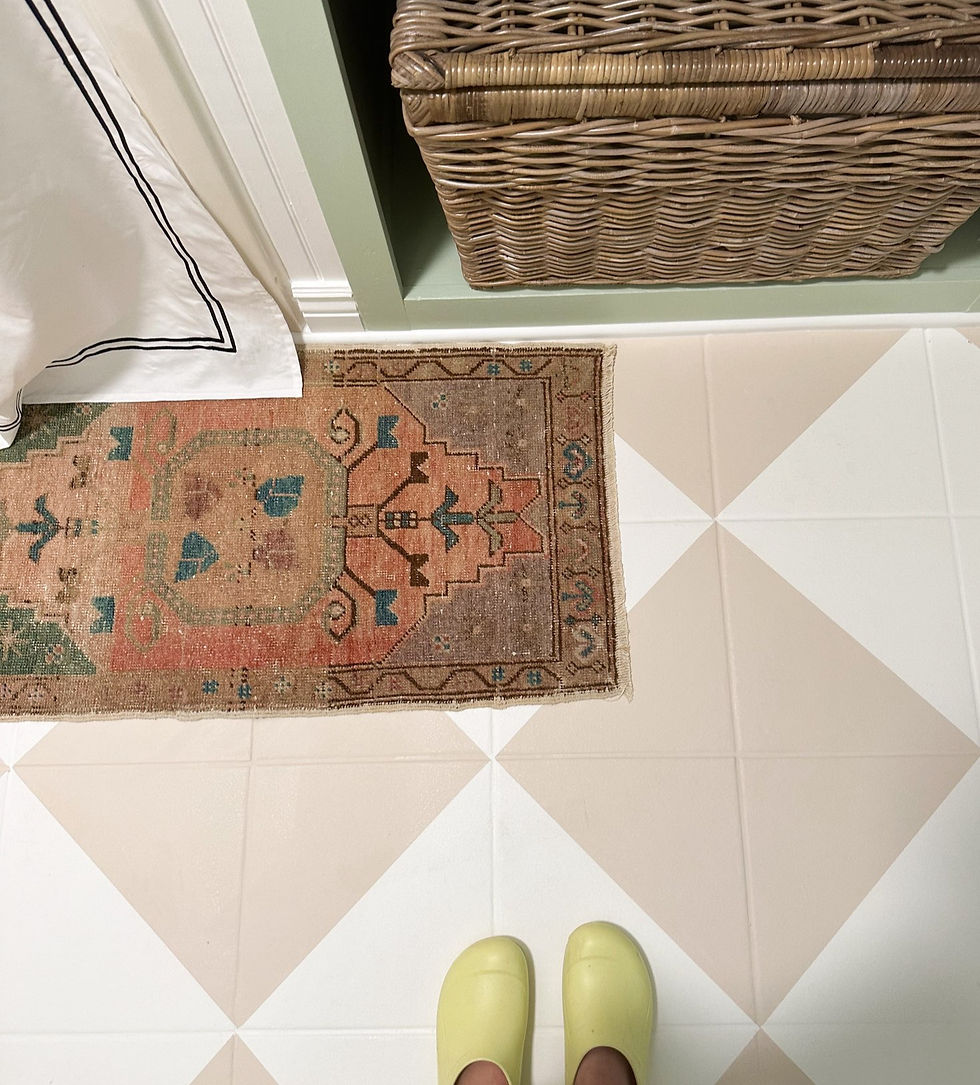
Paint -Waited 24 hours, and then put down two coats of my base color. I used Behr paints exterior paint for extra durability to be on the save side. My base color was a beige - I was going for a more patinaed / lived-in look so I chose beige instead of a stark white, and then used the same blue on the walls as the stencil color that helped create the design.
Stencil- Have patience here. This part is tough but it is worth it looking back. Take it slow. Like I did, you'll have to go back with a smaller brush and do touch ups once you pull the stencil up. I used this one from Cutting Edge Stencil.
Seal - Each step is important, but this one may be at the top of the list. After all that handwork, make sure you seal your brand new floor. I used this one from Home Depot. I was a bit nervous when I was done sealing because it looked like there was nothing to it, but like it says on the bottle, it dries invisible. I ended up doing two coats of this because it felt like nothing was there.


You'll see in the middle picture is where I had to go in with a smaller brush and do touch ups.
My review six months later is that they look the same as the day I finished the project, except where a glass bowl was dropped :( It left a tiny chip but I can easily go back and touch it up with some paint and sealer - I just haven't gotten around to it yet.
I'm really impressed with how this project has held up because this isn't a guest bathroom that gets used infrequently - it's our main bathroom that we use morning and night! For upkeep, I clean the same way I do with other floors in our house.
This type of project isn't for every person or home out there, but I have zero regrets and am so glad I pulled the trigger on what some would consider a big no. It looks great, has held up really well, stretched my DIY-skills, and was a huge money saver.
If you ever want to do this project yourself, always feel free to send me a message on Instagram or a message here.


Comments